

1 Settings that matter in a horde game
The store promises screen filling zombie tides and spectacular ways to obliterate them. Both halves of that sentence are a warning about visual noise.
| Setting | What to do and why |
|---|---|
| Frame rate over fidelity | Hundreds of enemies plus elemental effects is the heaviest thing the game draws. Stability beats detail |
| Damage numbers | Useful early to learn what your gear does, distracting later when the screen is full of them |
| Screen shake | Explosions are a listed feature. Turning shake down makes your own position readable |
| Controller | Support is only partial. Test in a throwaway run rather than discovering it during a boss |
2 The two progressions
Most confusion in the first hours comes from mixing up what belongs to a single run and what belongs to the account. Keep them separate in your head.
A failed run is never wasted, because Contribution Points are retained regardless. That changes how aggressive you should be early: pushing until you die is often more efficient than retreating.
3 Your first weapon choice
Three families are named on the store page, and they behave differently enough that the first one you learn shapes your early hours.
| Family | Suits you if |
|---|---|
| High rate submachine guns | You want constant output and forgiving aim while you learn enemy waves |
| Tactical shotguns | You are comfortable letting enemies get close in exchange for clearing a direction instantly |
| Heavy rocket launchers | You are already reading the field well and want area damage rather than reaction speed |
Start with sustained fire. In a game where the failure mode is being surrounded, a weapon that keeps working while you reposition teaches you more than one that rewards perfect timing.
4 Reading an item without a wiki
With hundreds of weapons and tactical gear pieces, no list will stay current in Early Access. What does stay current is how to evaluate a drop in ten seconds.
Golden beams mark legendary drops with game changing affixes, so those deserve a proper read. Everything else can be judged quickly and sold or recast later.
5 Elemental effects and when they help
Burn, Freeze and Shock are named as ways to exploit enemy weaknesses. In a horde game each of these usually solves a different problem, and knowing which problem you have is more useful than knowing which element is strongest.
Diagnose your deaths before choosing. If you are dying to being overwhelmed, control helps more than damage, and no amount of extra output will fix it.
6 Surviving the mutant lords
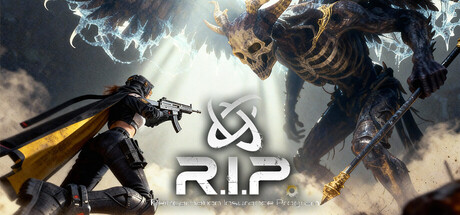
Each mission ends with a colossal mutant lord, and the store is unusually direct about what is required: agile movement and precise evasion.
It is equally direct about the alternative. Once your gear and build are strong enough, those same bosses become training dummies. That is the honest shape of a loot game, and it means a boss you cannot beat is usually a signal to farm rather than a skill wall.
7 A sensible first week
| Stage | Focus |
|---|---|
| First few runs | Learn movement and one weapon family. Ignore optimisation entirely |
| Once gear starts stacking | Pick one element and start refusing pieces that do not support it |
| First Legend Contract | Read the set bonus properly. It is usually worth building toward rather than ignoring |
| When the campaign feels easy | Save the build and take it into the Void Spire |
Prioritise frame rate and turn screen shake down before your first run. Keep the two progressions separate: blessings and skills reset, while gear, set bonuses and Contribution Points do not, so dying costs you almost nothing. Start on sustained fire weapons, judge drops by whether they change what your weapon does rather than by raw numbers, and pick an element based on how you are actually dying. If a mutant lord beats you twice, farm instead of retrying, and once the campaign stops resisting, save the build and take it into the Void Spire.
Comment
No comments yet. Be the first to post one.